Adding a New Item
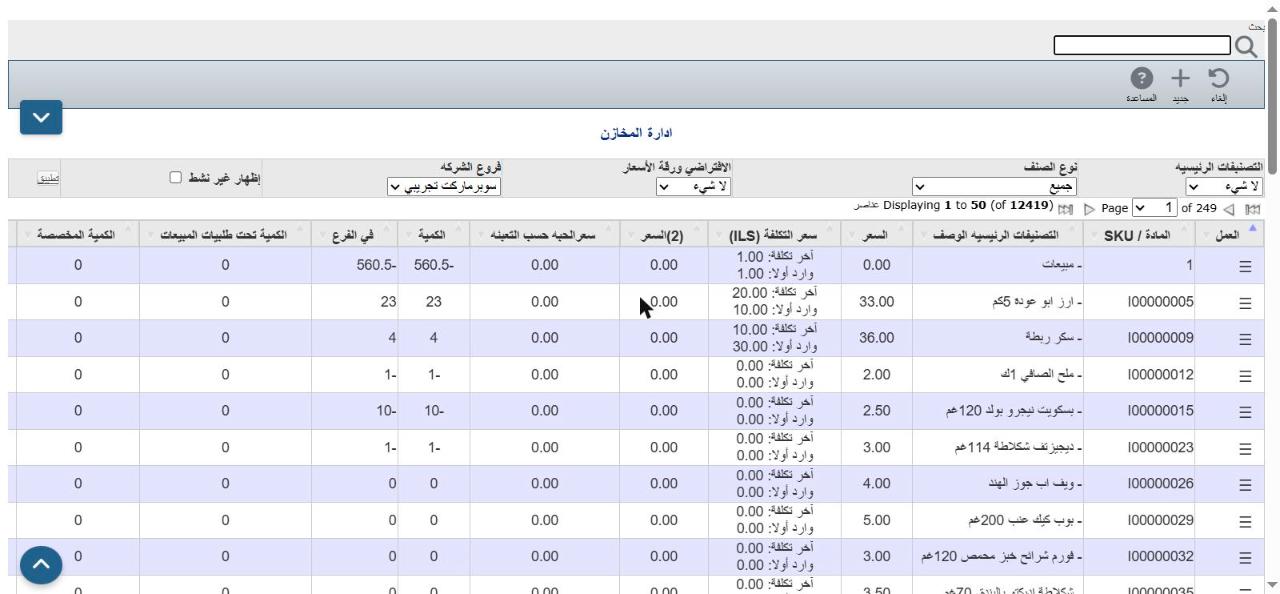
1Open Inventory Management and click "New"
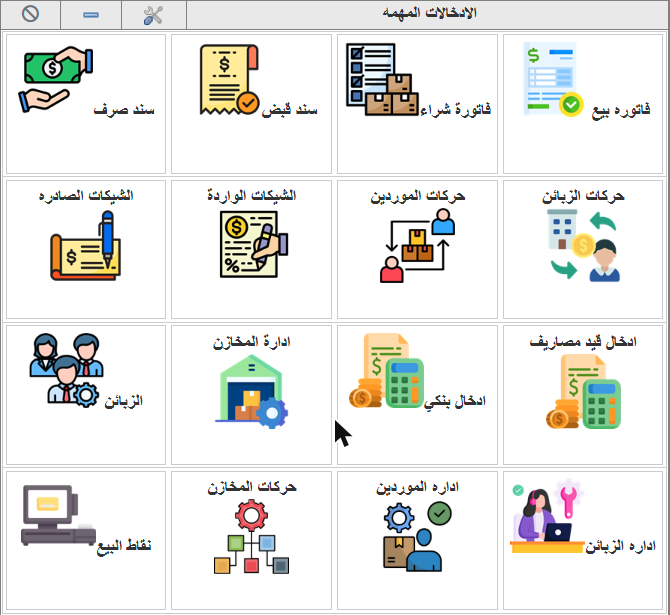
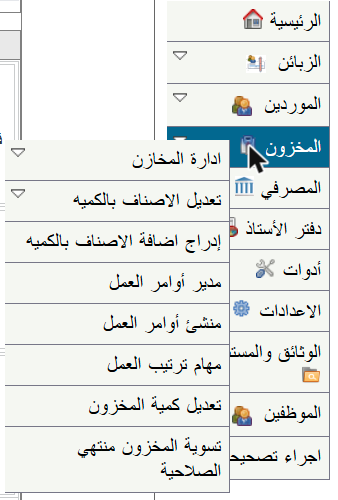
Open the Inventory Management screen in either of two ways:
- From Important Entries on the home page: click the Inventory Management icon.
- Or from the side menu: Inventory → Inventory Management.
Then click New ( + ) at the top of the screen.
2SKU, item type and cost method

| Field | What to choose |
|---|
| SKU | The system suggests the next number. Keep it or type your own (up to 13 characters). |
| Item type | Stock item for normal goods that have a balance. Non-stock item for services. |
| Cost method | FIFO (first in, first out) suits most shops, or Average (average cost). |
Then click the arrow → to continue.
⚠ Item type and cost method are hard to change once the item is used in invoices, so choose them carefully.
3Item description
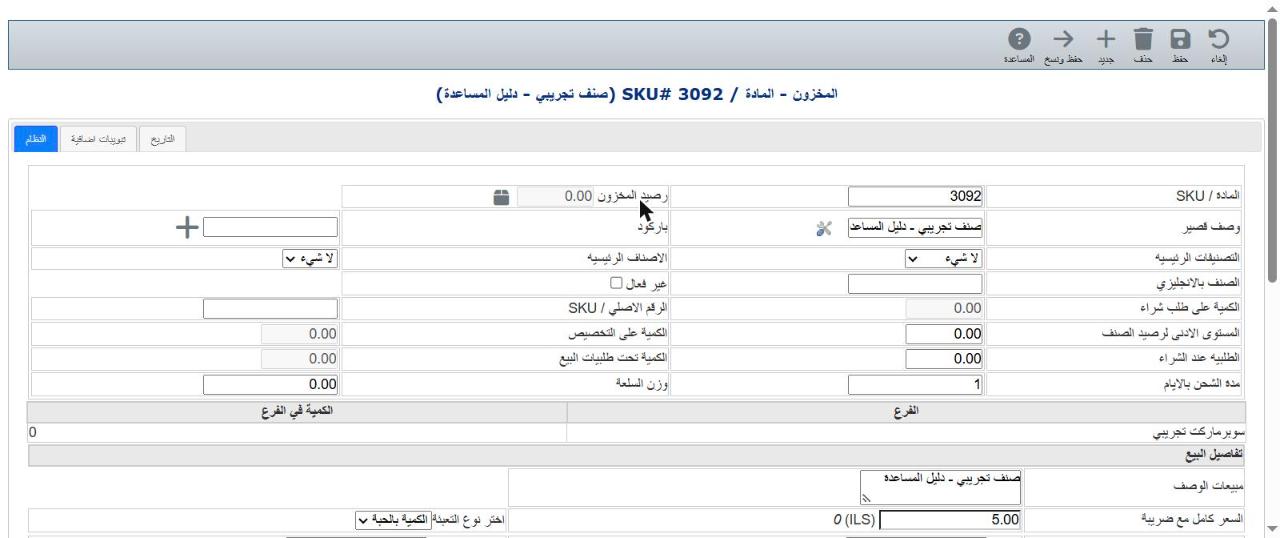
Enter a Short description (shown on invoices and at the point of sale), and the Barcode if there is one.
4Sale price and packing

- Full price incl. tax: the piece price for the customer.
- Packing type: piece / bundle / dozen / carton. Choosing a packing fills Quantity per unit automatically (for example, carton = 24).
- Piece price by packing: the piece price when selling by the packing (for example, a full carton).
- Profit level: calculated automatically from price and cost.
5Vendor and cost
In Purchase details, choose the Vendor and enter the Cost price. Add more vendors with the + button.

6Enter the stock balance from the item card
Click the box icon next to Stock balance. The Inventory Adjustments window opens:
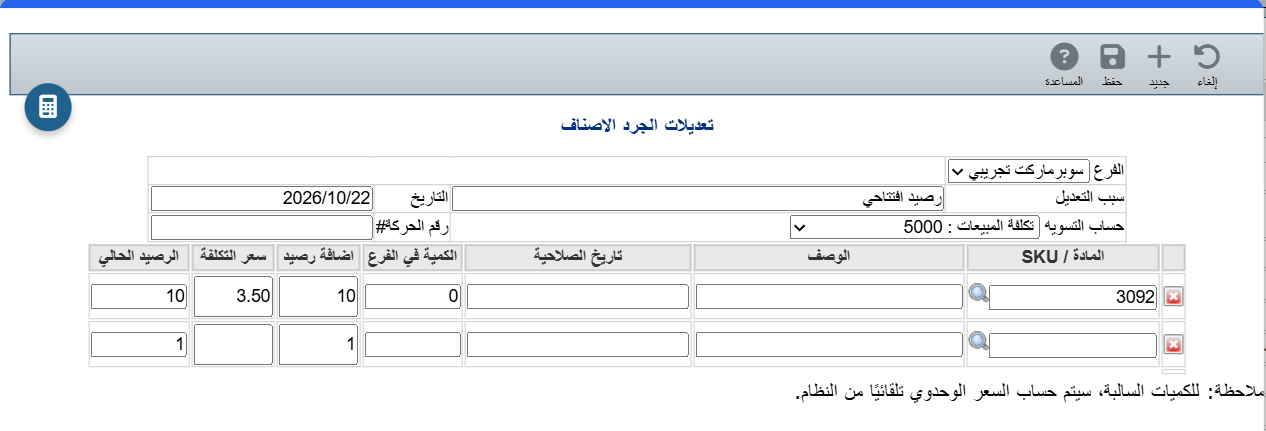
- Reason: for example "Opening balance".
- Add quantity: the quantity (for example 10).
- Cost price: the cost per piece.
Click Save in the small window. The new balance appears on the card:

💡 You can enter the balance before saving the item, without leaving the card.
7Save the item
Click Save at the top. To add a similar item quickly, use Save & Copy.

💡 For an item you no longer sell, don't delete it. Tick Inactive so its past transactions stay correct.